Showing posts with label Blyth Craft Studio. Show all posts

Monday, 7 July 2014

Quick Butterfly tutorial

Morning all :-) Hope that we had a fab weekend doing lots of fun things! I had a bit of a nightmare with a nasty bite on my foot that has gone dodgy and made my foot the size of a blimp :-( So i am off to the Dr's later on to see if they are just going to chop it off and be done with it!

Anyways i thought as it's a nice sunny day i would share this gorgeous quick and easy paper butterfly tutorial with you all.

What you will need....

Heart die cuts i used my sizzix original x4 heart die
Assortment of Papers
Assortment of Sticky Gems
Double sided tape

Simply cut 2 hearts the same size, join them with double sided tape then cover the join with sticky gems then fold the wings inward slightly! That's it super cute and super quick and perfect for any crafting project :-) 


Have fun with these little cuties :-) xx


Tuesday, 1 July 2014

Tutorial Layered flowers :-)

Well after a long time away again due to my health i have got myself into a better place so i am ready to get blogging again.

I eventually got my big shot for my birthday and i am in love with it!! You can do so much with it and believe me i have been. Today i am going to share a layered flower tutorial with you all. 

Pop by and LIKE my facebook page for a chance to win a kit to make 5 of these yourself.
Emsie Makes


What you will need.......

Sizzix Big shot
5mm Double sided sticky tape
Assorted Gems
Mixed flower die
Sticky pads
Assorted papers and cards


Start off by selecting lots of different coloured papers and cards in different textures and thicknesses then cut lots and lots of sets of your flowers ready to layer up.


Now you have lots of flowers cut you can really start to have fun with them, I love different textures and effects so i started experimenting with the cuts.


For this one i picked a really nice, heavy card.


To start i folded down the center of the petals on all of the cut flowers to give them a really nice shape.


Once i have done it with them all you are ready to start layering them up.


 I love this thin tape, double sided tape available at most craft shops


Place a piece of the double sided tape on the back of one of the petals and attach to another in an alternate style.


Continue to layer them up in size order from largest to smallest in alternated colours as shown.


Build up till you have no more flowers left then you are ready for the final detail and that's the bling!


Use some of the sticky tape on the back of your chosen gem and then add it to your layered flowers.


Now these are ready to use on lots of different crafty projects, i will be using mine on my cards. They will look amazing in red and green for Christmas cards.

Hope you all have lots of fun trying this out xxx


Monday, 26 May 2014

Decoupage stamping card topper tutorial

Well lately i have had a bit of a tough time so i have not had time to blog, get into my creation cave or  get near my computer for that matter! It really has been a rollercoaster of crazy that is only calming down for a day or 2 then back to madness for a week! So while i have the chance to blog and craft i am grabbing it with both hands ;-)

I have recently discovered ProMarkers and i love them, i have been practising my shading technique and control. I have some gorgeous stamps that i wanted to combined with my new toys to really bring them to life.


What you need to get started...

Rubber stamp
Ink pad in black
ProMarkers
Scrap of White Card
Perspex Block


Stamp a full size image and then another 2 of the part you want to male into decoupage.


Select the colour ProMarkers you want to use, i am loving nautical colours at the moment.


Colour the full image, leave the middle one white and colour the piece to go on top identically to the full sized image.


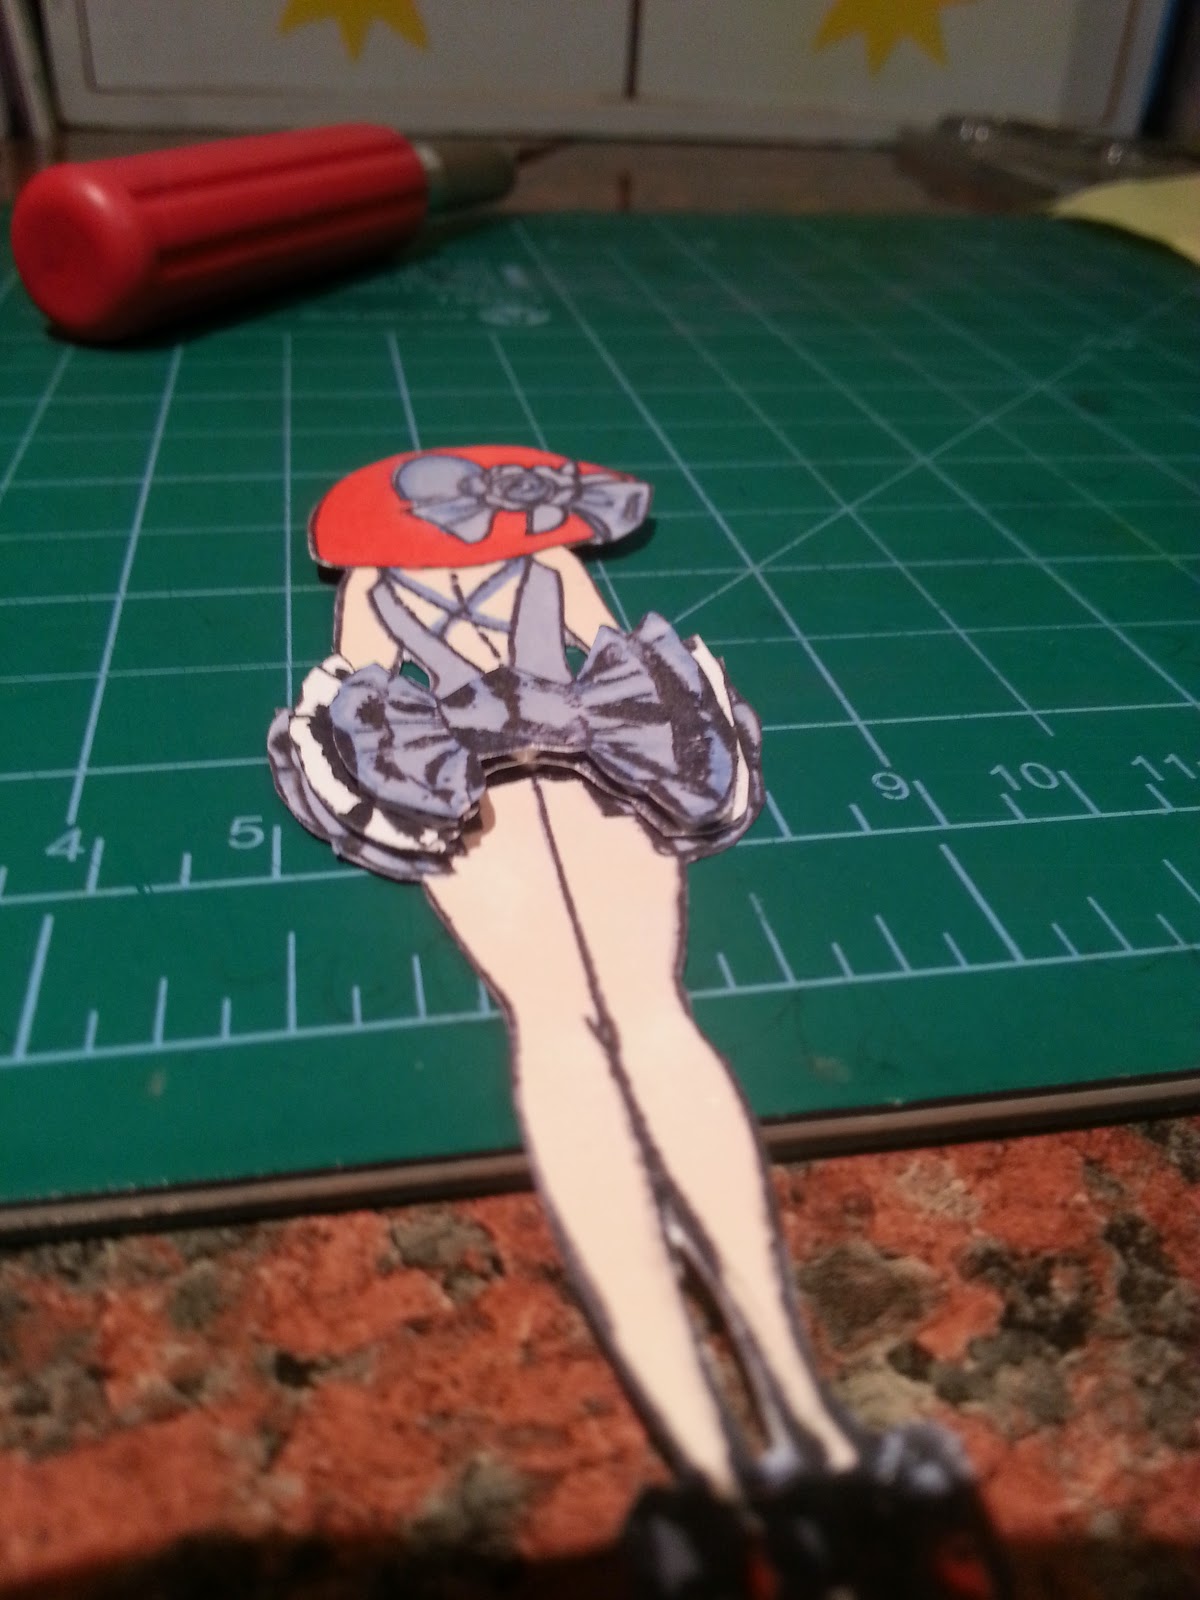
Then cut them out with scissors and/or a craft knife, remember to cut the middle layer smaller than the full sized image and the top part smaller than the middle part to get a gorgeous 3D layered effect. I cut the ruffles on the skirt detail to get this effect. Once you have done this get some sticky pads and layer it up.


Once you have done this you are ready to make the mount :-)


What you will need for this....

Ink Pad of whatever colour you choose
Make Up sponge
Die Cut Oblong 
Sticky Pads
Liquid Pearls


Dab the sponge on the ink pad then press on the die cut to transfer the colour, i always make the corners darker when making these so it really stands out.


Now it's ready to attach your decoupage with foam pads.


Finally take some liquid pearls and add some in the corners, on the hat and at the back of the dress along with a sticky gem.


And that's it ready to attach to any card ;-)


Tuesday, 6 May 2014

Standing theater card tutorial

I am so glad the bank holidays are over for a few weeks again, they always throw me out with my days! I do love spending them crafting though and have made one or two pretties over the weekend.

I especially love the card i am going to show you how to make, it looks really complicated but in fact is rather easy to make and it looks beautiful when finished.

What you will need to get started

1 sheet of A4 card
Ruler
Craft Knife
Cutting mat
Pencil
6x6 Papers, here i used Lily rose papers free with cardmaking inspiration this month.
Double sided sticky tape.
Paper trimmer
Embellishments
Inks
Rubber stamp
Perspex block
Foam pads


My free gifts in this issues Cardmaking Inspirations. A rubber stamp set and papers from Lily Rose 


Start off by taking your sheet of A4 card and your ruler, pencil and craft knife and turn to landscape view.


Start by trimming the card so it measures 14cm from top to bottom in landscape view.
Then measur 4 lines from top to bottom at 4.9cm, 9.9cm, 19.9cm and 24.9cm along that go to 14cm like shown above and score these lines (i use a craft knife and ruler but you can get scoring boards for this)

Next measure along the top and bottom marking up 2.4cm, 12.4cm. 17.5cm and 27.4cm then measure 2.5cm lines downwards and upwards along the top and bottom and score the 2.5cm lines. Then between the top of the 2.5cm lines cut through to make a slit in the card at both the top and bottom.


After all the measuring, scoring and cutting fold like this above, it can be a bit fiddly but it should end up looking like this.


After you fold both sides your card should stand like this :-)


Now you have a base for your decorations :-0 


Firstly i start by cutting my backing papers to fit the panels you want to cover, here are the bits you will need. When choosing your papers fiddle about and see what colours work well with each other.


You will need 2 pieces for the center measuring 9.8cm x 8.7cm and 8.7cm x 7.8cm
For the panels on the side cut 4.7cm by 8.6cm and for the small pieces cut 3 pieces 4.6cm x 2.3cm.


Back with double sided tape and start layering up and attaching to the card.


You can see how it starts to build up, i decided to stamp the center panel with the beautiful lily rose stamps using Tim Holtz Distress Ink in Faded Jeans and Yinks Pink Ink to give it a 3d effect on the paper. You can decorate you card however you wish, there are so many options for these cards.


Here is my finished card stamped up, embellished up and ready to give to someone.
Also used Woodware Craft collection Punches for top hearts and flowers,
Poundland flowers, dragonfly's and heart gems.

Let me know if you give this a try i would love to see your versions ;-) xx


Tuesday, 29 April 2014

Crazy Days!

Well the past 2 days have been a bit mental! Firstly my poor baby cat had to go to the vets then today i have been to the hospital so i haven't had chance for much fun stuff. I have however been to my fave place in the world Blyth Craft Studio and got myself a few goodies as a reward for the nurse injuring me. I got some gorgeous papers, a new Woodware craft Creations cow punch which i love love love! Some Distress Ink in Faded Jeans, 2 Memento inks in Desert Sand and Rich Cocoa, some Stix 2 Anything die cut ovals and squares as i still don't have my Sizzix Big Shot :-( some card scrap packs and a gorgeous Chinese design Delta rubber stamp. So i now have lots of fun things to play with over the next few days.


I love the cow punch 

Sunday, 27 April 2014

Product Review Woodware Craft Collection Flower Punch

Well i thought i would start my product reviews and no better place to start than with my Woodware Flower punch. I bought it among my first purchase from Blyth Craft Studio and i love love love it.


First of all i love the colour, i mean who doesn't love pink. Secondly i adore the flowers it produces, you can make a scrap of paper into something handy and very pretty that i can use over and over on my creations. The cut is nice and crisp with no ragged edges and considering my grip is pretty shocking it is easy to hold and use. All in all it gets a big thumbs up and 10/10 from me. I can't wait to collect some more beautiful punches in the range.


I love them all :-) 

For more info about Woodware crafts amazing range of goodies and the retailers that stock them pop by and check them out.


Wednesday, 23 April 2014

Everyone needs a craft haven like Blyth Craft Studio!!

While flicking through my Cardmaking &Papercraft magazine i spotted the craft awards article, as i am pretty new to crafting magazines i was excited to find out that these awards exist. As i begin to read it i soon spotted some familiar names among honors such as Sizzix, Tattered Lace, Hobbycraft and so it goes on listing the creme de la creme of the crafting world that had won awards. 

As i read further into the article i discover the independent craft store awards and become rather excited to learn that the Midlands region winning craft shop Blyth Craft Studio is a 20 minuet drive away from me.

As i am passing by on the way to a hospital appointment i decide that it would be rude not to call in for a nosy! The big blue building in the middle of the gorgeous village of Blyth cannot be missed. Parking to the rear of the shop is ample and no more than a 20 yard shuffle.


Once through the door a friendly voice say's 'hello, shall i put the kettle on?' I look around to see if someone the lady knows has came in behind us, but nope there is just myself and my partner in the shop. I think i was that taken aback the second i walked through the door, i literally thought i had died and gone to craft heaven. 


We started chit chatting about crafting and the products in the shop, i was enquiring about die cutting machines and what Kim would recommend as i am totally new to it all. With that said Kim told me the only thing she will stock are big shot machines by Sizzix as they have the best track record and was more than happy to give me a demo as i had never used one before. We continued to chat as i perused the treasures in her vast stock range, honestly there as nothing i couldn't find in this beautiful Aladins cave of crafty amazingness!


As i continue through the most amazing shop i have been in ever i think, my wish list keeps growing and growing. All the colours and pretties had got the creative ideas flowing but trying to select what goodies to buy and what not to was very hard as i wanted it all pretty much. I was gutted i couldn't afford more on that particular day. There were so many new products that i had never came across before nor have any idea how to use, but Kim was very happy to answer any questions i had and explain how to use things and what goes with/ works with what.


My first lot of goodies from Blyth Craft Studio :-) 

Since my first visit i have been back twice and i will be back again on Tuesday to for another peruse and purchase from this amazing shop. There really isn't anything missing from Blyth Craft Studio whatever your crafting niche is.


Paper Paper everywhere ;-) in every colour and pattern imaginable.


Ooooo the choices!


Fill a box of card for a set price, yes please.


I have been purchasing many sheets of these beautiful papers.


Rubber stamps to suit every genre and occasion.


One of my newest addictions punches.


Inks another new addiction. I am loving yinks for £2.99 bargain!


I shall be taking part in these classes once my hospital treatments are complete. I can't wait to learn new skills and develop my crafting knowledge further.


Just one section of the shop! 

I am counting down the days to my birthday so i can go and have a mega spending spree in this beautiful shop. Kim obviously enjoys her work and it shows in her stock, customer service, knowledge and beautiful creations all around the shop. If you are passing i would advise calling in as it is literally a few miles off the A1 (the kettle's always on)

 I am actually gutted i hadn't discovered this place before. Not only for the pretties but for the advice Kim give, (the one to one customer service is unimaginable and so valuable) the classes and workshops Kim holds and organises that i can't wait to take part in and the all round experience you encounter when from the moment you walk through the door. I usually hate my hospital appointments but going here gives me a reason to smile afterwards :-)

Check out the studios website


Also pop over on facebook